Friday, December 23, 2011

Peppermint Marshmallows

Did you know that you can make marshmallows in your very own kitchen? Neither did I, until I saw them on Joy the Baker's blog. I decided I NEEDED to make them for myself. So do you!


Pour some gelatin and water into your stand mixer. If you don't have a mixer....borrow a friend's. I don't think there's a way around it.


While the gelatin and water are getting to know each other, combine corn syrup, sugar, and water in a pan. Don't count the calories. Just tell yourself that marshmallows are mostly air.


Bring this to a boil and keep it there for a minute.


Take it off the heat, turn your mixer on high (the gelatin has now become....well, gelatinous), and slowly stream the boiling sugar mixture in. FOR THE LOVE, please be careful! Burning sugar isn't something to mess around with!

This is what the mixture looks like at first. Not very marshmallow-y.


Five minutes in, it's more recognizable.


After 10 minutes, add peppermint extract (but only if you're feeling crazy!) and pour the whole mixture into a pan that's oiled and lined with plastic wrap. Grab another piece of plastic wrap, spray it with a non-stick spray, and press it against the top of the fluff.


Marshmallow fluff....mercy.


Wait a couple hours for the mixture to set up, and then get ready to make a mess.


Set up a coating station. Marshmallows are sticky, and they need to be contained. Powdered sugar is just the guy for the job.


Peel off the top plastic wrap, lift the whole concoction out of the pan, and turn it upside down. Slowly peel the bottom plastic wrap off, and voila!


Spray a sharp knife with non-stick spray, and cut the fluff into cubes.


Toss them in small batches in the powdered sugar. Aren't they adorable!


These were so easy and didn't require much time or effort. This was a great addition to some goodie boxes I made this year - much easier than rolling out and cutting cookies!


Here's a link to the original from Martha Stewart. She even has a video! I figured, if she can do it, I can too! :-)

Skillet Cookie

Once upon a time, a girl named Paige had a blog. She enjoyed baking and taking photos to post, but then life happened. It does that sometimes. She spent the next 11 months travelling, taking classes, teaching some punk kids, and figuring out life. While she doesn't have ANYTHING figured out yet, she decided that it was time to bust out the camera.

And the cast iron skillet.


To make cookies.

Yes, cookies. In a cast iron skillet. Just get over it and join the fun.


Start by melting some butter over low heat. Add sugar and vanilla, and remove it from the heat for about five minutes.


When it's cooled down, add an egg. Then stir in the flour, salt, and baking soda.


Throw in some chocolate chips and walnuts and spread it out evenly in the pan. Do NOT eat the dough! You're trying to lose weight, remember?...maybe that's just me.


Pop this beauty in the oven for 15 minutes or until it comes out golden brown. I had mine in for about 20 minutes, and it was really set in the middle (so leave it in less for a gooier cookie!).


The beauty of this is that I couldn't sneak a bite before taking it to a Christmas party!! If you steal a normal chocolate chip cookie, nobody knows! But this required patience.


It divided up nicely into 16 servings. These pop right out of the pan because of the melted butter they started with.


Here's a link to the original for the recipe. I HIGHLY recommend it! Did you notice that I didn't use a mixer or any mixing bowls for this? That is my favorite part! Only one dish, start to finish - and it looks cool to serve in, too!

Enjoy!

Monday, January 31, 2011

Pasta e Fagioli - Olive Garden style

Snow days.

Ah, how I love snow days. When I was little, snow days meant hours of reading Babysitters' Club, playing Oregon Trail, and maybe venturing out to throw some snowballs at my sister.

Now, snow days mean sleeping in, catching up, cleaning my house, baking bread, and fixing a big pot of soup.

Tomorrow is a snow day - I got a head start on the soup. :-)


I love Olive Garden's pasta e fagioli soup - it's kind of an Italian chili. This is seriously a perfect copy of that recipe. Love it!

Start by browning 1/2 lb Italian sausage and 1/2 lb ground beef.


Chop up some carrots, celery, onion, and garlic. You'll need about a cup of each veggie, and 2 cloves of garlic.


Toss these in the pot with the browned meat, and let them hang out for about 10 minutes. Good things will happen.

Pour in two 14-oz cans of diced tomatoes, one 15-oz can of tomato sauce, another 8-oz can of tomato sauce, 1/2 cup water, a tablespoon of vinegar, one can of great northern beans, and one can of red kidney beans.
Mix it all together and add one teaspoon each of basil and oregano, then half a teaspoon of thyme. Salt and pepper the soup, and let it groove (a.k.a. simmer) for about an hour.


About 10 minutes shy of the hour mark, boil some water and cook the pasta to go in the soup. The original recipe suggested ditali pasta, but HyVee didn't have any, so I just got some small shells. I used a 7 oz box.

Toss these in and stir to combine.


Mercy.


I happened to have some fresh parmesan on hand, so I grated some on top of the soup.


This is a perfect winter meal, and so easy to throw together!!
Here's the link to the original recipe.

Thursday, January 6, 2011

Cookie Extravaganza!

This Christmas I made 10 dozen cookies.

Excessive, I know.

But I love giving cookies away, and I made 4 new recipes this year.

I made Pistachio Sandies (similar to Russian tea cakes or Mexican wedding cookies) - delicious!


I forgot to take a picture of these all dressed up with powdered sugar. But they were even better. :-) I included the recipe at the bottom of this post.
I made spicy molasses cookies (courtesy of The Pioneer Woman)


Also very tasty.


But then I made these.


Chocolate candy cane cookies.
Also from The Pioneer Woman.


These turned out to be beautiful. But not tasty.


The cookie kind of tasted like cardboard. But I really like the idea, so I might try to find a better chocolate cookie idea.


Pistachio Sandies
1 cup pistachios, skins removed
8 oz butter, softened
2 1/4 cup flour
1/3 cup powdered sugar
1/2 tsp vanilla
1 tbsp water
1 cup extra powdered sugar for dusting/rolling
Heat oven to 350 degrees. Grind the pistachios into a course meal. Place butter into a large bowl and beat for 30 seconds. Add half the flour, powdered sugar, vanilla extract, and water. Beat until blended and then add the rest of the flour. Stir in the nuts. Pinch off 1-inch pieces of dough and roll into balls. Place onto a cookie sheet and bake for 20-25 minutes. Allow to cool all the way and then dust with powdered sugar.

Wednesday, January 5, 2011

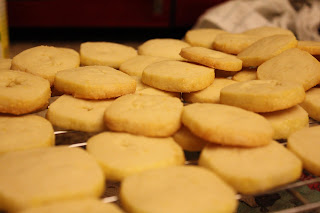
Lemon Butter Cookies

I have a cookie extravaganza post coming up, but I wanted to highlight this cookie.

It's light and crisp and fantastic.

I got this recipe from Sassy Radish, a cooking blog I've had been following lately.


I didn't take pictures of the dough process, so I'll just refer you to the above link. You have to let the dough rest overnight - I shaped mine into a long rectangle so I would have little square cookies. This was a great idea. :-)
After it's rested, brush it with an egg yolk and roll it in sugar until it's totally covered.

The more sugar, the better. Always.


Slice it up - this makes a lot of little cookies.


I got all 50 bazillion of them to fit on one cookie sheet, so that worked out well! Make sure you use parchment paper so they pop right off.


Aren't they cute?


They just need about 12 minutes in the oven, rotating them halfway through.


Lovely! You should most definitely make these at your earliest convenience!!